The Bluetooth Interface
In this page you can find all the info about the Bluetooth device.
Step 1: the device
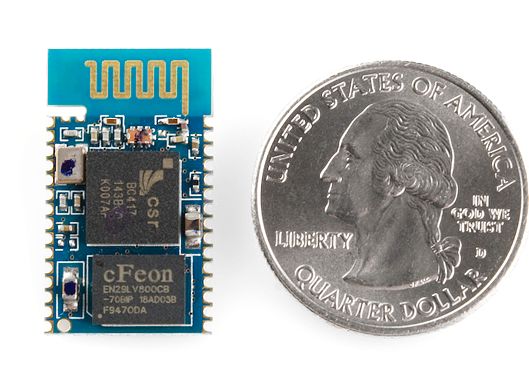
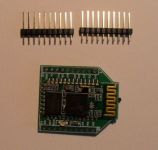
On internet you can find many similar Bluetooth devices, with a common characteristics: the very small size.
Here you can see the most common type:
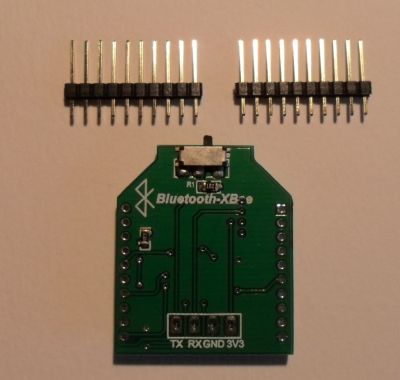
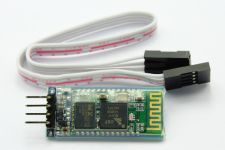
If you don't have particular skill in the soldering or you don't have tools to manage this small objects I suggest to
buy the same device mounted on a breakout board, with these advantages:
- Easier to solder
- One status led already mounted
- The switch for the AT or transparent mode
You can see this device here:

I've found this device here: Ebay shop.
You can find also a similar module (tested by other users) on
HobbyKing
(I've no commercial link with these shops, maybe you can find a similar device in a different place)
You can find different devices that could be used for this project (not tested by me), for example this one (for Arduino)
.
Just try to do a search for "Bluetooth module" on Google or Ebay.
Step 2: accessories
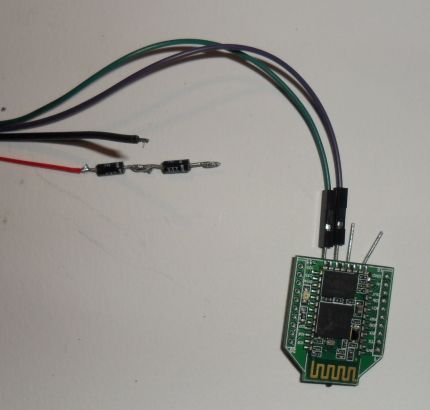
If you build an external device (as described in this page) you need:
- One 4 pin mini-DIN female connector
- One 4 pin mini-DIN male connector
- Two diodes 1N4007 (to drop the 5v of the USB port to 3.3v)
- Four thin wires
You also need a thin soldering tip, an ultra Fine thin 0.5mm solder lead/Tin 60/40, 4 little metallic pins
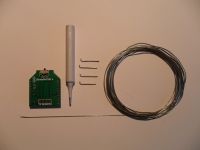
In my photos you will see the use of this kind of jumper wire
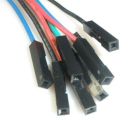
because I was building a prototype, but during a normal building you will be able to use normal wires.
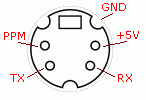
This is the schema of the port on the radio:
The building of the module is a 2 phases process:
- Connect the wires to a female mini-DIN connector, because you have to connect it to the pc for the setup
- Disconnect the previous connector and solder the male one, for the final use
Step 3: Preliminary setup
You need the female connector to connect the device to a serial port for the preliminary setup, then you will
unsolder/cut/disconnect the wires and you will build the final object.
The preliminary setup is necessary because the Bluetooth device must be configured for the right serial port baud rate and
optionally with the Bluetooth device name (I've called mine radio_hobbyking) and a custom pairing password.
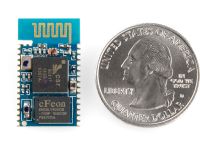
The following information apply to the Bluetooth device seen above in photo, for different device you have to read the manual
With the factory default the serial port speed is configured at 9600 baud, you must change it to 115k baud (the baud rate of the
serial port of the radio), to achieve this result you need to:
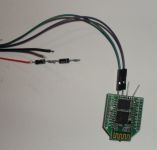
- solder the Bluetooth device to the female mini-DIN connector
- connect it to the USB cable that you already have to setup your radio
- using a Serial Terminal software send the commands to the device
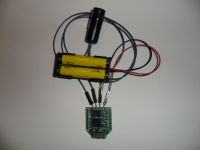
In the following photo you see that the device is power up with 2 AAA batteries, as I did later the test to power directly
with the USB 5v line, you can connect the 3.3v of the device to the 5v of the USB plug using two 1N4007 diodes in series (see later the detail).
After having plugged the device to the USB/Serial cable you can use a serial terminal software to test it.
The parameter are: 38400 baud, parity none, 1 stop bit, parity none.
I've developed a small utility for this purpose:
- download it on the desktop
- execute it
- choose the COM port mapped to the cable (the same port used by DigitalRadio) and press Open Port (the parameters described above are embedded)
- type AT in the command line and press Send, you must obtain OK as answer: if you don't see anything there is an error in the wires soldering
- type AT+NAME=RADIO_HOBBYKING and press Send to change the name of the device (RADIO_HOBBYKING is a sample)
- type AT+NAME=RADIO_HOBBYKING and press Send to change the name of the device (RADIO_HOBBYKING is a sample)
- type AT+PSWD=9876 and press Send to change the pairing password to 9876 (optional, the default is 1234)
- type AT+UART=115200,0,0 and press Send to change serial parameter to 115200 baud, 1 stop bit, parity none
Step 4: ready to go
After the last command you have finished the preliminary setup of the device and you can unsolder/cut/disconnect the wires from the female mini-DIN female and
solder them in the definitive Bluetooth interface.
Here some documents found on internet, for different modules.
Other pages on Internet about the Bluetooth interface
Radio HK T6a com Interface Bluethooth
|